2. Initial Administrative Phase
In this Phase, the phasing faction resolves any Political Events on its Current Card, places support units and Convoy markers, and organizes its ground forces.
2.1 Political Events Segment
Skip this Segment if the phasing faction’s Current Card does not have a section that reads Political Events Segment.
If the faction’s Current Card does have a section that reads Political Events Segment, the phasing faction must perform all actions listed in that section, in the order listed, even if it already resolved those actions on a previous turn of the current season.
Many Political Events are resolved by rolling one die, applying Political DRMs (1.1.2.1), and comparing the result to a Political Events Table or text on the card. Modified die rolls less than 1 or greater than 6 are treated as 1 and 6 respectively. Some results on Political Events Tables will direct players to another Political Events Table. If this happens, roll the die again, apply Political DRMs and compare the result to the appropriate table. If directed to yet another Political Event Table, continue rolling (still applying Political DRMs) until some final result is obtained.
A final result is any result that does not call for rolling on another Table. If the final result is an italicized Political Event, look it up in the appropriate rules section for instructions on how to apply it.
Eliminating Steps: : If the elimination of steps is required by a Political Event, see Eliminating Steps (4.2.6.2).
2.2 Support Segment
Important: If you haven’t done so already, go to the Glossary section and read about Air Base, Naval Base, Multi-Zone Port, Naval Zone, Naval Zone Box, Open Port, and Restricted Waterway. Their definitions are important to the rules in this section.
Design Note
The large-scale employment of ships and aircraft has been abstracted into the various support units available to each faction. Support units can do many things: provide combat support, create Beachheads, interdict enemy movement and supply, prevent enemy replacements from appearing in a replacement location, and so on. Efficient use of these assets is one of the keys to victory.
For many DS newbies, this section is one of the hardest parts of the design to understand. Our advice: be patient and proceed slowly, step by step through the Sequence of Play. We’ve also prepared a Support Unit & Convoy Marker Player Aid Card that summarizes the rules in this section. Keep that handy.
The phasing faction performs actions in the Support Segment in the following order:
Step 1: Return to Base (2.2.1)
Step 2: Beachhead Maintenance (2.2.2)
Step 3: Support Unit and Convoy Marker Placement (2.2.3)
Step 4: Blitz Marker Placement (2.2.4)
Step 5: Beachhead Failure (2.2.5)
2.2.1 Return to Base
All phasing faction support units and Convoy markers located in a hex, Naval Zone Box, or Strategic Warfare Box are removed from the map. If the unit or marker has a Delay Stripe, place it in the Delay Box. Otherwise, place it in the faction’s Force Pool.
Clarification
An obvious exception: the inherent Supply Convoys printed on the map are not removed.
Flip an Escort Troop Convoy marker printed on the back of an Air Force or Surface Fleet unit to its support unit side before placing it in the Delay Box. Flip a CV Strike unit to its CV Fleet side before placing it in the Delay Box.
2.2.2 Beachhead Maintenance
If the phasing faction has a Beachhead-1 or Beachhead-2 marker in an All-Sea hex, it may leave that marker on the map provided it meets these two conditions:
- The marker is stacked with friendly ground units.
- The marker’s Beachhead Hexside (i.e., the arrow) points to a Land hex occupied by enemy units.
If a Beachhead-2 marker will remain on the map, it must be flipped to its Beachhead-1 side.
Design Note
This represents the headway the invaders on the beach are making into the defenses
If the phasing faction’s Beachhead marker does not meet the two conditions above, it must be removed to the faction’s Force Pool. Before removing the marker, the phasing faction may immediately conduct an Inland Advance (see below) with any or all ground units stacked on the Beachhead marker.
If the Beachhead marker meets the two conditions above, the phasing faction may return the marker to its Force Pool anyway. Leave the ground units in the All-Sea hex for now. If they are not stacked with a Beachhead marker at the end of the Beachhead Failure step, they will be eliminated (2.2.5).
Design Note
You might wish to pick up a Beachhead marker in order to place it in the same hex facing a different direction. Or you might simply need the Beachhead marker elsewhere, even if it means losing those steps.
△ Axis SNLF Beachhead-0 markers: Axis SNLF Beachhead-0 markers that were placed earlier this turn (during an Option Card Segment or Political Events Segment) automatically remain on the map.
Inland Advance: To perform an Inland Advance, take a unit on the Beachhead marker and place it in the Land hex adjacent to the marker’s Beachhead Hexside. This is not movement, so ignore the unit’s Movement Allowance and any Movement Point costs.
There is no limit to the number of units that can conduct an Inland Advance.
An Inland Advance can be conducted during Mud, Storms, or Snow turns.
2.2.3 Support Unit and Convoy Marker Placement
If the phasing faction has a support unit in its Force Pool, it may place that counter on the map using the rules for Support Unit Placement (2.2.3.1).
If a support unit is placed, each of the non-phasing factions in turn has the option to contest that placement with a support unit in its Force Pool using the rules for Contesting Support Unit Placement (2.2.3.2). If both non-phasing factions can potentially contest a placement, the order of resolution is Axis, Western, Soviet.
Once both non-phasing factions decline to contest the placement of a phasing support unit, that unit is considered successfully placed. Once successfully placed, a support unit cannot be contested again in that Segment. Exception: A CV Strike unit may be contested as it is being flipped from its CV Fleet side.
Until a support unit is successfully placed it has no effect on the map.
Example: The Axis faction attempts placement of a Japanese Air Force unit on Manila (w3824), which contains a supplied US ground unit (making it a US Air Base). Normally, a hex with an enemy Air unit cannot be an Air Base. However, the Western player can contest placement at this time using Manila as an Air Base because the Japanese Air unit is not yet “successfully placed.” If he chooses to not contest this placement, the Japanese Air unit is then successfully placed and Manila is no longer a US Air Base for that Segment.
If the phasing faction has a Convoy marker in its Force Pool, it may place that marker in a Convoys Box on the map using the rules for Convoy Marker Placement (2.2.3.6).
Clarification
Convoy marker placement cannot be contested – only support unit placement.
After a support unit or Convoy marker is placed and any contest resolved, the phasing faction may place another available support unit or Convoy marker. The non-phasing factions again have the option to contest this new placement. Play alternates in this fashion until the phasing faction declares it is finished with this step of the Support Segment.
Clarification
Support unit placement and Convoy marker placement can occur in any order the phasing faction wishes. Players are not required to place or contest any support units or Convoy markers. They may save some for use on later turns.
2.2.3.1 Support Unit Placement
To place a support unit, the phasing player takes a support unit from his DS Force Pool and places it in a hex, Naval Zone Box, or Strategic Warfare Box as limited below.
Fleet Unit Placement:
CV Fleet: A CV Fleet can be placed in an All-Sea hex or On Station Box. The CV Fleet must be able to trace a Fleet Unit Path as described below. In addition, the placement location’s Naval Zone must contain a Naval Base of the same nationality. Important: If successfully placed in a hex, the CV Fleet must immediately flip over to its CV Strike side and attempt placement as a CV Strike as described below.
△ Surface Fleet: A Surface Fleet can be placed in an All-Sea hex or On Station Box. The Surface Fleet must be able to trace a Fleet Unit Path. In addition, the placement location’s Naval Zone must contain a Naval Base of the same nationality. (Exception: If the Axis faction is using a Neutral Vichy Fleet unit, that unit’s Naval Base must be German.) Important: If successfully placed in an All-Sea hex, the unit must place a Beachhead marker (2.2.3.4). If successfully placed in an On Station Box, the phasing faction must immediately decide if the unit will flip over to its Escort Troop Convoy marker side (2.2.3.6).
△ Sub Fleet: A Sub Fleet can be placed in the On Station Box of a Naval Zone that contains a Naval Base of the same nationality. The Sub Fleet does not have to trace a Fleet Unit Path. (Exception: Sub Fleets cannot be placed in the Caspian Sea On Station Box.)
A Sub Fleet can also be placed in the Strategic Warfare Box if a Naval Base of the same nationality is somewhere on the map. No Fleet Unit Path is traced; just place the unit
Clarification
Sub Fleets (and Bombers below) are printed with a DRM on the front, to remind you those units impact enemy Delay DRMs when they’re in the Strategic Warfare Box.
Fleet Unit Path: The path is traced from a Home Country Naval Base or Home Country Open Port, along a continuous chain of adjacent Naval Zones and/or Off-Map Boxes, to the Naval Zone containing the placement location. If the Zone of placement contains a Home Country Naval Base, then no path is traced, just place the unit. Each Naval Zone or Off-Map Box along the path except for the Zone of placement must contain a friendly Open Port.
Any Western Off-Map Box can be considered a Home Country Open Port for a Western fleet unit.
Restricted Waterway Restriction: A Fleet Unit Path cannot be traced between the following adjacent Naval Zones unless one of the ports listed with that pair of Naval Zones is an Open Port:
- Sea of Japan and Sea of Okhotsk: Toyohara (e5505).
- Sea of Japan and Japanese Coast: Hakodate (e5205), Nagasaki (e4501) or Toyohara (e5505).
- Sea of Japan and Yellow Sea: Nagasaki (e4501).
- South China Sea and Bay of Bengal: Batavia (w2819) or Singapore (w3218).
Clarification
Note that you need at least one Open Port in each Naval Zone along the Fleet Unit Path – however, that port does not have to be a Multi-Zone Port “connecting” the two Naval Zones unless it is required to meet the Restricted Waterway restriction.
A port can be a Naval Base without being an Open Port. The distinction is important. Basically, enemy support units in an On Station Box do not block a Fleet Unit Path being traced into that Naval Zone – only through it.
Example: There is a supplied British ground unit in Genzan (w5127), making it a British Naval Base, and an unsupplied US ground unit in Nagasaki (e4801), making it a Western Open Port. A British Surface Fleet can be placed in an All-Sea hex in the Sea of Japan Naval Zone, because the Western faction can trace a Fleet Unit Path through the Restricted Waterway of Nagasaki and back to the Western US Box.
How can the Japanese faction stop the British Fleet from being placed in the Sea of Japan? A Japanese CV Fleet or Surface Fleet unit in the Yellow Sea Naval Zone would block the Fleet Unit Path. (A Japanese CV Fleet or Surface Fleet unit in the Sea of Japan Naval Zone would not do that.) Alternately, a Japanese Air unit in Nagasaki would block the Fleet Unit Path through that Restricted Waterway.
Air Unit Placement:
Air Force or Interceptor: An Air Force can be placed in an All-Sea or Land hex within three hexes of an Air Base of the same nationality. The unit must be able to trace an Air Unit Path as described below. Important: If successfully placed in an All-Sea hex, the phasing player must immediately decide if the unit will place a Beachhead marker (2.2.3.4).
Example: A supplied British ground unit is in Singapore (w3218), making it a British Air Base. The Western faction can place a British Air Force in any hex from Singapore out to three hexes. It cannot place a US Air Force though as that requires a US Air Base.
An Air Force can also be placed in the On Station Box of a Naval Zone that contains a Naval Base of the same nationality. Important: If successfully placed in an On Station Box, the phasing faction must immediately decide if the unit will flip over to its Escort Troop Convoy marker side (2.2.3.6)
Example: A supplied Japanese ground unit is in Saigon (w3619), making it a Japanese Naval Base. The Axis faction may place a Japanese Air Force in the South China Sea On Station Box.
An Interceptor can be temporarily “placed” only to contest the placement of another support unit (2.2.3.2), but when doing so it is treated as if it were an Air Force unit.
Bomber: A Bomber can be placed in a Land hex within nine hexes of an Air Base of the same nationality. The unit must be able to trace an Air Unit Path. Important: If successfully placed in a hex, the phasing faction must immediately flip the Bomber marker to its Devastation marker side (2.2.3.5).
A Bomber can also be placed in the Strategic Warfare Box if an Air Base of the same nationality is somewhere on the map. No Air Unit Path is traced; just place the unit.
Example: A supplied US ground unit is in Saipan (e3906), making it a US Air Base. Thus, the Western faction may place a US Bomber unit in the Strategic Warfare Box. Strategic warfare just happens.
CV Strike: A CV Strike can be placed in an All-Sea or Land hex within one hex of its CV Fleet, immediately after that CV Fleet was successfully placed. Just flip the Fleet unit over to its Air unit side and place it within one hex. The CV Strike must be able to trace an Air Unit Path. The hex does not have to be in the same Naval Zone as the CV Fleet.
ClarificationThink of the CV Fleet unit’s hex as the Air Base hex for the CV Strike unit. Remember that a CV Strike unit may be contested even after its CV Fleet unit was successfully placed. This nuance is important, because Surface Fleet units cannot contest CV Fleet units but they can contest CV Strike units.
Example: The US TF11 CV Fleet is successfully placed in the Micronesia Naval Zone in hex e3009. The unit flips over to its CV Strike side and is placed one hex away in Kavieng (e2908), which is legal even though that hex is in the Bismarck Sea Naval Zone.
Air Unit Path: The path is traced from the Air Base, along a continuous chain of adjacent hexes, to the placement hex. The path cannot go into a Land hex affected by Mud, nor may it go into a hex in a Neutral Minor Country (13.4) or Policy Affected Country (13.6).
2.2.3.2 Contesting Support Unit Placement
Clarification
Remember – the placement of a marker, such as a Convoy or Airdrop marker, cannot be contested.
To contest enemy support unit placement, a non-phasing faction takes an appropriate support unit from its Force Pool and declares that it is contesting placement. The phasing and non-phasing support units are then immediately placed as follows:
- An Air unit goes in the Delay Box.
- A Fleet unit goes in the Naval Warfare Delay Box.
It does not matter which unit was being placed or contesting; only its unit type determines which Box it goes in.
Clarification
This is the only effect of contesting placement. The battles between these units are fought in the Delay Boxes, with the winners being the first ones to come back into play.
Remember that a CV Strike is an Air unit and a CV Fleet is a Fleet unit. So pay attention to which side they’re on when being placed or contesting. Since a CV Strike unit is an Air unit, it will go in the Delay Box, while a Fleet unit will go in the Naval Warfare Delay Box (making it susceptible to an extremely long delay result).
“Placed in the same location” (seen in the rules below) means the non-phasing faction places its contesting unit using the Support Unit Placement rules (2.2.3.1). If it cannot be put in the placement location, it cannot contest there.
Contesting Placement in a Hex:
Air Force or Interceptor: An Air Force or Interceptor unit can contest any support unit placed in an All-Sea or Land hex if it can be placed in the same location.
Example: A US Air Base in Guadalcanal (e2611) allows a US Air Force unit to contest placement of an enemy support unit within three hexes of Guadalcanal.
CV Fleet: A CV Fleet unit can contest any support unit placed in an All-Sea hex if it can be placed in the same location.
CV Strike: A CV Strike unit can contest a Surface Fleet placed in an All-Sea hex if its CV Fleet can be placed in the same location.
Example: A British CV Strike unit can contest placement of a Japanese Surface Fleet unit in an All-Sea hex in the Bay of Bengal Naval Zone, provided a British Naval Base is in the Bay of Bengal Naval Zone and the CV Fleet can trace a Fleet Unit Path to that Zone.
Surface Fleet: A Surface Fleet unit can contest an Air Force, Surface Fleet or CV Strike (not CV Fleet) placed in an All-Sea hex if it can be placed in the same location.
Contesting Placement in an On Station Box:
Air Force or Interceptor: An Air Force or Interceptor unit can contest any support unit placed in an On Station Box if it can be placed in the same location.
CV Fleet: A CV Fleet unit can contest any support unit placed in an On Station Box if it can be placed in the same location.
CV Strike: A CV Strike unit can contest a Surface Fleet or Sub Fleet placed in an On Station Box if its CV Fleet can be placed in the same location.
Surface Fleet: A Surface Fleet unit can contest an Air Force, Surface Fleet or Sub Fleet placed in an On Station Box if it can be placed in the same location.
Example: A US Surface Fleet unit can contest placement of a Japanese Air Force unit in the Coral Sea On Station Box, provided a US Naval Base is in the Coral Sea Naval Zone and the US Surface Fleet can trace a Fleet Unit Path to that Naval Zone.
Contesting Placement in the Strategic Warfare Box:
Axis or Soviet Air Force or Interceptor: One of these units can contest a Bomber placed in the Strategic Warfare Box if an Air Base of the same nationality is somewhere on the map. No air unit path is traced; just contest the placement.
ClarificationWestern support units cannot contest the placement of Axis Bomber units in the Strategic Warfare Box.
Axis or Western Air Force, Interceptor, CV Fleet, CV Strike, or Surface Fleet: One of these units can contest a Sub Fleet placed in the Strategic Warfare Box if a Naval Base of the same nationality is somewhere on the map. No air or fleet unit path is traced; just contest the placement.
ClarificationSoviet support units cannot contest the placement of Axis Sub Fleet units in the Strategic Warfare Box.
2.2.3.3 Support Unit Placement and Contesting Restrictions
Air Unit Restrictions:
An Air Force or CV Strike unit cannot be placed in or adjacent to a hex containing a successfully placed friendly Air unit.
ClarificationA Bomber or Fleet unit can be placed adjacent to a friendly Air unit.
A support unit cannot be placed in or adjacent to a hex containing a successfully placed enemy Air unit, unless it is contesting the placement of another enemy support unit.
ClarificationSuccessfully placed Air units do not, by virtue of this restriction alone, prevent you from contesting the placement of other support units. However, a successfully placed Air unit may cause the non-phasing faction to lose its ability to contest for other reasons.
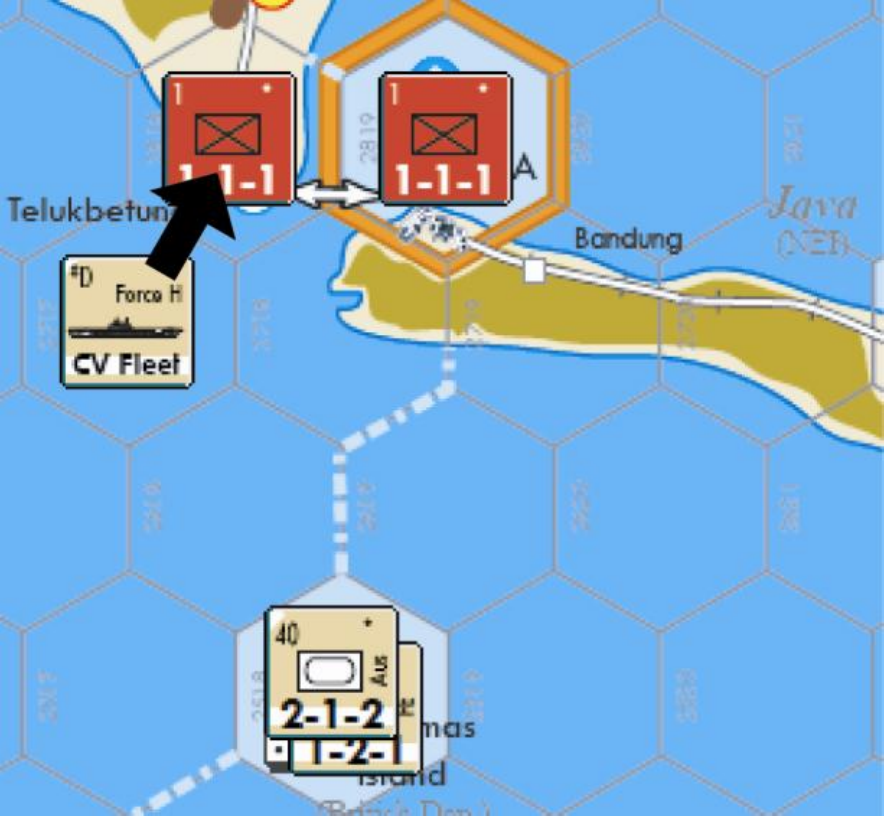
Example: The Western faction is trying to launch an invasion of Java from Christmas Island (w2518). There are supplied Japanese infantry units in both Telekbetung (w2818) and Batavia (w2819), making those ports Air Bases and Naval Bases. The Axis faction has one Japanese Air Force unit to hold back the Western faction.
The Western faction places a CV Fleet in w2717. The Axis faction chooses not to contest, so the Western faction flips the unit over to its CV Strike side and moves it over to Telekbetung.
he Western faction now chooses to place a Surface Fleet unit in w2618. The Axis faction can contest this placement from its Air Base in Batavia, despite the CV Strike unit being adjacent to the Surface Fleet. If the Axis faction did not have an Air Base in Batavia, it would not be able to contest this placement from Telekbetung – the Western CV Strike unit there means that port cannot be used as an Air Base.
Weather Restrictions:
- An air unit cannot be placed in any hex of a Weather Area experiencing Mud (11.3).
- △ A support unit cannot be placed in any All-Sea hex in the Sea of Japan, Sea of Okhotsk, Northwest Pacific, North Pacific, or Gulf of Alaska Naval Zones when the North Weather Area (11.1) is experiencing Snow (11.5).
- △ A support unit cannot be placed in any All-Sea hex in the Bay of Bengal, Philippine Sea, or South China Sea Naval Zones when the North Monsoon Weather Area is experiencing Mud.
- △ A support unit cannot be placed in any All-Sea hex in the Arafura Sea or Bismarck Sea Naval Zones when the South Monsoon Weather Area is experiencing Mud.
Other Restrictions:
- No support unit can be placed in Pre-War (12.1).
- △ If the Kamikazes marker is in the Strategic Warfare Box, the Axis faction cannot place a Japanese Air Force, Surface Fleet, CV Fleet, or CV Strike unit in a hex or On Station Box in the Axis Faction Turn. These units can only be used in an Allied Faction Turn to contest the placement of Allied support unit.
- Support Unit Placement and Contest can be limited by Policies (13.6.1), Truces (13.6.2), and Failures (14.15).
2.2.3.4 Beachhead Marker Placement
Air Force: Immediately after an Air Force unit is successfully placed in an All-Sea hex, the phasing faction may exchange the unit for a Beachhead marker from its Force Pool. If the exchange is made, place a Beachhead-2 marker in the same hex as the Air Force unit, then put the Air Force unit in that Naval Zone’s Used Box. Once made, this decision is final and cannot be changed later.
Surface Fleet: Immediately after a Surface Fleet unit is successfully placed in an All-Sea hex, the phasing faction must exchange the unit for a Beachhead marker from its Force Pool. Place a Beachhead-1 marker in the same hex as the Surface Fleet unit, then place the Surface Fleet unit in that Naval Zone’s Used Box.
Clarification
A defender attacked from a Beachhead-2 marker receives two CRT column shifts (4.2.3). A defender attacked from a Beachhead-1 marker receives only one CRT column shift.
Note that Interceptors, Bombers, CV Fleets, and Sub Fleets cannot place Beachhead markers. Also note that each faction has its own Beachhead marker; they do not belong to specific nationalities.
The special Axis SNLF Beachhead-0 markers are placed via the Operation Z (15.29) and Widespread Attacks (15.37) Political Events.
Successful Placement: When a faction places a Beachhead marker, it must orient the marker so that its arrow points to a Land hex. The hexside between the All-Sea hex and the Land hex is the Beachhead Hexside.
Beachhead Marker Placement Restrictions:
- A Beachhead marker cannot be placed so that it points to a Hex in a Neutral Minor Country (13.4).
- A Beachhead marker cannot be placed so that it points to an All-Sea hex, even one containing another Beachhead marker.
- A Beachhead marker cannot be placed in a hex containing another Beachhead marker.
2.2.3.5 Devastation Marker Placement
After a Bomber unit is successfully placed in a Land hex, the Bomber unit must be flipped to its Devastation marker side. The phasing faction may also select one enemy Detachment or Logistics marker in the hex and place that marker in the Delay Box.
Clarification
Once placed, Devastation markers are never removed. This means you’ll permanently lose use of that Bomber unit, but you’ll always get to count that hex as being under your control during Victory Point Checks (0.1.1).
2.2.3.6 Convoy Marker Placement
With the technical exception of Escort Convoys (explained below), Convoy marker placement cannot be contested.
Clarification
While a support unit cannot contest or prevent placement of an enemy Convoy marker, a support unit in an On Station Box does prevent the ports in that Naval Zone from being Open Ports for an enemy faction. And Open Ports are essential for transport and supply across a Naval Zone.
Standard Convoy Marker Placement: A Standard Convoy marker can be placed in the Convoys Box of a Naval Zone that contains any of the following:
A Home Country Port for that Convoy marker.
A Port in a Dependent belonging to the Convoy marker’s Home Country.
A friendly Escort Troop Convoy marker in its Convoys Box.
ClarificationA Port in the Home Country or Dependent does not have to be an Open Port to allow Standard Convoy marker placement. Remember, a Western Off-Map Box can serve as a Home Country Open Port for any Western Convoy marker.
Nationality indicators are printed at the bottom of each Naval Zone’s Convoys Box to provide “at a glance” references for what countries can place Convoy markers there. Note that Ceded Land markers may allow a faction to place a Convoy in a Naval Zone it wouldn’t normally be able to reach – for example, if the Marshall Islands Region becomes a British Dependent, the Western faction can place a British Convoy marker in the Marianas Naval Zone.
Design NoteUsing an Escort Troop Convoy marker represents the player using his support units to “escort” the merchant ships. An Escort Troop Convoy marker does not have to be of the same nationality as the Standard Convoy marker to allow placement; it must only be friendly.
In order to be placed, a Standard Convoy marker must be able to trace a Fleet Unit Path (as defined in 2.2.3.1) from the Naval Zone to a Home Country Open Port.
Example: The Western faction has captured Okinawa (w4427) and placed a US Detachment there. If the Western faction wanted to place a US Convoy marker in the Yellow Sea Convoys Box it would first have to place a Western Surface Fleet or Air Force unit in the Yellow Sea On Station Box, then flip that unit over to become an Escort Troop Convoy and move it to the Convoys Box. That’s because there are no US Dependent Ports or Home Country Ports in the Yellow Sea Naval Zone.
Axis and Soviet Scratch Convoy Placement: An Axis or Soviet Scratch Convoy marker can only be placed in the Convoys Box of a Naval Zone containing a Key Port (see Terrain Key) that contains a friendly unit, Detachment, or Logistics marker. An Axis or Soviet Scratch Convoy marker does not need to trace a Fleet Unit Path to a Home Country Open Port.
Clarification
A friendly Air Force unit allows you to use a Key Port even if the Port contains an enemy ground unit.
Example: If the Axis faction puts a Japanese Air Force unit in Port Moresby (e2606), then the Axis Scratch Convoy can be placed in the Coral Sea or Arafura Sea Naval Zone Boxes, even if Port Moresby is occupied by Allied troops.
US Fleet Train Convoy Placement: The US Fleet Train Convoy marker can only be placed in the Convoys Box of a Naval Zone containing a Key Port that contains a US unit, Detachment, or Western Logistics marker. A Western Off-Map Box can also serve as a Key Port for this placement – no supplied ground unit, Detachment marker, or Logistics marker is required. The US Fleet Train Convoy marker must also trace a Fleet Unit Path to a Home Country Open Port.
Escort Troop Convoy Placement: Immediately after an Air Force or Surface Fleet unit is successfully placed in an On Station Box, the phasing faction must decide if the unit will become an Escort Troop Convoy marker. If it does, flip that support unit over to its Escort Troop Convoy side and move it to that Naval Zone’s Convoys Box.
Clarification
An Escort Convoy marker cannot be placed directly into a Convoys Box; it must first be placed as an Air Force or Surface Fleet support unit in an On Station Box. So, unlike the other Convoy markers, the non-phasing factions do get one chance to contest this placement – when the support unit is placed.
Convoy Mode: As a Standard Convoy, Scratch Convoy, or Fleet Train Convoy marker is placed, the phasing faction also selects its Convoy Mode by placing the marker Troop or Supply side face up. A Troop Convoy allows units to move across a Naval Zone. A Supply Convoy allows a supply line to be traced across a Naval Zone.
Design Note
Convoy Mode is important. For example, if a Japanese Convoy marker in the Coral Sea is in Troop Convoy mode, the Axis faction can move units across the Coral Sea, but any Japanese units in, say, Australia would be unsupplied.
Clarification
Surface Fleet or Air Force units can only function as Escort Troop Convoys, not as Supply Convoys.
Note that many Naval Zones have an inherent Supply Convoy for the Western or Axis factions.
There is no limit to the number, type, or mode of Convoy markers that can be a Naval Zone Box.
2.2.4 Blitz Marker Placement
If the phasing faction has a Blitz marker available, it may place that marker in any hex on the map.
Exception:
- △ If the phasing faction has a Beachhead marker on the map, it must place one Blitz marker in the same hex. After all hexes with friendly Beachhead markers have received Blitz markers, any additional Blitz markers may go in any other hexes. Exception: The Axis faction is never required to place a Blitz marker on an SNLF Beachhead-0 marker.
- △ If the A xis faction places a Blitz marker in a Land hex and the Army is not “leading the government,” the Axis faction must roll on the Cabinet Crisis Table. Political DRMs (1.1.2.1) do apply to this roll.
- △ If the A xis faction places a Blitz marker in an All-Sea hex and the Navy is not “leading the government,” the Axis faction must roll on the Cabinet Crisis Table. Political DRMs (1.1.2.1) do apply to this roll.
Design Note
As you place your Blitz markers, keep in mind that having one in a City hex turns it into an “open city” by canceling the defender’s Voluntary Retreat Conversion ability (4.2.5.3).
There are two ways in which a faction may have a Blitz marker available:
- The phasing faction will have a number of Blitz markers available equal to its Current Card’s Blitz Value.
- The phasing faction will have a Blitz marker available if one was awarded by a Political Event in the Option Card Segment or Political Events Segment.
Any available Blitz marker not used at this time is lost and cannot be saved for another turn.
Clarification
A Blitz card generates a number of Blitz markers equal to its Blitz Value during each turn that it is a faction’s Current Card. A Blitz marker created by a Political Event is available for use during the next Support Segment only.
2.2.5 Beachhead Failure
At the end of this step, all phasing ground units in an All-Sea hex without a friendly Beachhead marker are eliminated. Eliminated units that have a Delay Stripe are placed in the Delay Box; those without a Delay Stripe are returned to their Force Pool.
2.3 Organization Segment
The phasing faction may combine one-step ground units on the map to form multi-step units and break down multi-step units into one-step units. Actions in the Organization Segment are performed in the following order:
Step 1: Combinations (2.3.1)
Step 2: Fortress and Garrison Conversions (2.3.2)
Step 3: Voluntary Eliminations (2.3.3)
Step 4: Breakdowns (2.3.4)
Step 5: Detachment Placements and Removals (2.3.5)
Clarification
It’s important to get these in the right order! First you combine, then you break down. For example, the Axis faction cannot break down a two-step infantry army into two one-step infantry units and then re-combine those units into a two-step HQ unit in the same Organization Segment.
Force Pool Limitation: The units available in a faction’s Force Pool are an absolute limit on Combinations, Breakdowns, and Fortress Conversion.
Delay Stripes: When a unit or marker with a Delay Stripe is removed from its location due to a Combination, Fortress Conversion, or Breakdown, place it in the Delay Box. If the unit or marker does not have a Delay Stripe, place it in its Force Pool.
One-Step and Multi-Step Units: One-step units are the building blocks for each faction’s ground units. A one-step ground unit may be taken from the Force Pool and placed on the map when it is taken as a replacement step or when a multi-step unit performs breakdown.
Multi-step ground units are created when a number of one-step units combine into one unit. A multi-step ground unit may be taken from a Force Pool and placed on the map only when one-step units in a hex are combined during the Organization Segment.
Multi-step units are composed of a certain nationality, number of steps and unit-types. A faction’s Force Pool Display indicates the specifics to be used when combining or breaking down certain units.
Important: If a certain kind of a multi-step unit is not shown on a faction’s Force Pool Display, that multi-step unit is composed of infantry-type steps only. Exception: A fortress unit may be built with armor or infantry steps.
Example: A three-step 6-6-3 British mech army is shown on the Western Force Pool Display. It is composed of two British infantry- type steps and one British armor-type step. The first two steps must be infantry-type steps. If a third step is added or removed, it must be an armor-type step. All similar British mech armies are composed of the same nationality, number of steps, and unit types.
A Japanese HQ unit (which has no picture on the Axis Force Pool Display) is composed of only infantry-type steps. It cannot be formed with any armor-type steps!
Nationality Requirement: When combining or breaking down multi-step units, all involved units must be of the same nationality.
Example: A three-step Western army is composed of two infantry steps and one armor step. If you are creating the US 5th Army, all the steps used must be US.
△ Exceptions:
- The Axis AEx multi-step HQ unit is formed using Japanese and Axis Minor Country one-step infantry units as specified on the Axis Force Pool Display. The Axis Minor Country unit used is placed in the Holding Box on the Axis Force Pool Display.
- A Soviet multi-step Communist Chinese HQ unit is formed using Soviet Chinese Minor Country one-step units only, as specified on the Soviet Force Pool Display. The Chinese Minor Country units used are not placed in any Holding Box.
- A Western multi-step Nationalist Chinese HQ unit is formed using Western Chinese Minor Country one-step units only, as specified on the Western Force Pool Display. The Chinese Minor Country units used are not placed in any Holding Box.
- A British one-step infantry-type unit and a US one-step infantry- type unit must combine to form the CBI HQ unit on its two-step side. Either a British or US one-step armor-type unit can be added to combine the CBI HQ unit on its three-step side. This armor-type step is placed in the CBI HQ Holding Box on the Western Force Pool Display.
- The British FE infantry unit and a Western Minor Country one- step infantry-type unit must combine to form the ABDA Army. The Western Minor Country unit used is placed in the ABDA Army Holding Box on the Western Force Pool Display.
- Although Kwantung units are considered Japanese units, only Kwantung units can be used when combining a multi-step Kwantung unit. When breaking down non-Kwantung Japanese units, Kwantung units cannot be taken from the Force Pool and placed on the map.
Clarification
Only two one-step Kwantung infantry units can combine to place the 2-1-2 two-step Kwa HQ unit on the map.
One-step units in Holding Boxes are not available for use by the owning faction until they are placed on the map when breaking down those multi-step units.
Clarification
Holding Boxes are used to determine the unit’s nationality for various rules purposes.
2.3.1 Combination
The phasing faction may combine smaller step-value units into higher step-value units. Important: Only supplied units in an Off-Map Box or stacked in a hex can combine.
Combining units is done one step at a time, but can continue as long as further combinations are possible.
Example: A British one-step armor unit and two British one-step infantry units are in the same hex. In one Western Organization Segment, the Western faction can first combine the two infantry units (to form a two-step British infantry unit), and then combine the armor unit with the two-step infantry unit to flip it over to its three-step mech side.
2.3.1.1 Combining Units
Combining One-step Units: A one-step unit with a two-step unit on its other side can be built up to the two-step side by removing a one-step unit from the map and flipping the other one-step unit to its two-step side.
Example: A Japanese 0-1-1 infantry unit and 1-1-1 one-step infantry unit in the same hex combine by removing the 0-1-1 unit (which is placed in its Force Pool) and flipping over the 1-1-1 to its 2-2-1 two- step side.
A Russian one-step 1-1-1 infantry unit and Russian one-step 2-1-1 Shock infantry unit can combine to increase either unit to its two-step side. The other goes to the Force Pool.
Two one-step units can be combined to form a two-step unit without a one-step unit on its other side. Remove the one-step units from the map and place the desired two-step unit in the same location.
Example: Two US one-step infantry units are removed from the map and a US two-step HQ unit is taken from the Western Force Pool and placed where the two one-step units were removed.
Combining One-step and Two-step Units: A one-step unit can be combined with a two-step unit with a three-step unit on its other side. Remove the one-step unit from the map and flip the two-step unit to its three-step side.
Example: A British 3-4-1 two-step infantry unit and a British 2-1-2 one-step armor unit combine by removing the 2-1-2 unit and flipping over the 3-4-1 unit to its 6-6-2 three-step side.
2.3.1.2 Combining Restrictions
Unsupplied units cannot combine.
Units in a hex containing an enemy Air unit cannot combine.
All fortress (2.3.2.1) and garrison units (2.3.2.3) cannot combine with any other unit. A port-a-fort unit (2.3.2.2) can combine with another unit when it is on its infantry or mech side only
△ Japanese colonial units cannot combine with or into Japanese non- colonial units. Exception: If the Showa Restoration marker is in the Strategic Warfare Box, the Axis faction may combine one Japanese colonial unit with a Japanese non-colonial unit by placing the Showa Restoration marker in the Delay Box.
△ Japanese Kwantung units cannot combine with Japanese non- Kwantung units.
Clarification
Japanese colonial and Kwantung units and all Garrison units have squares instead of dots for their Step Value to remind you of this. These units can be converted into fortress units (2.3.2.1).
A player cannot switch different multi-step units in the process of combining.
Example: The Axis player cannot combine a 3-3-1 Japanese two-step infantry unit and a one-step 0-1-1 infantry unit, and replace them with a 3-2-1 Japanese three-step HQ unit.
2.3.2 Fortress and Garrison Conversion
2.3.2.1 Fortress Units
A fortress unit can be placed on the map only by converting a one-step infantry-type or armor-type unit in a Land hex. To do so, remove a one-step unit from the map and place the desired two-step fortress unit of the same nationality from the Force Pool in that same location.
Clarification
That’s right, you remove one step and get a two-step fortress unit in return. A Japanese one-step armor unit can convert into a Japanese two-step Per fortress unit.
A unit cannot be converted into a fortress if there is already another fortress unit in the hex.
A ground unit does not have to be supplied to convert to a fortress.
A ground unit can be converted to a fortress in a hex containing an enemy Air unit.
Clarification
Fortress Conversion is allowed in a hex containing an enemy Air unit even though ground units cannot combine in that hex (per Combining Restrictions above, 2.3.1.2).
Unless specifically stated otherwise, there is no limit to the number of units that may be converted to fortress units within a turn.
△ Japanese colonial units can convert into Japanese fortress units
2.3.2.2 Port-a-Fort Units
Japanese 1-1-2 IG infantry units and Chinese 1-1-1 Def infantry units have one-step fortress units on their other side.
Clarification
We call them port-a-fort units because they are essentially mobile forts.
A port-a-fort unit with its infantry side face up can convert to its fortress side; simply flip the unit over. A port-a-fort unit cannot be converted into a fortress if there is already another fortress unit in the hex.
No other one-step units can convert to these one-step fortress units. A one-step port-a-fort infantry unit may also be used to build a regular two-step fortress unit.
A port-a-fort unit with its fortress side face up can convert back to its infantry side; simply flip the unit over to its infantry side. These units do not go in the Delay Box when converting back to a non-fortress unit in this manner.
2.3.2.3 Garrison Units
A Garrison unit is any unit with a movement allowance of zero that is restricted to a specific hex listed in 2.3.2.4.
A one-step garrison unit can be placed on the map only by converting a one-step infantry-type or armor-type unit in the proper Land hex. To do so, remove the unit from that hex and place the desired garrison unit of the same nationality from the Force Pool in the same location.
A one-step ground unit does not have to be supplied to convert to a one-step garrison unit.
A one-step ground unit can be converted to a one-step garrison unit in a hex containing an enemy Air unit.
2.3.2.4 Fortress Conversion and Garrison Unit Restrictions
All 0-1-0 garrison infantry units are restricted to the hexes printed on the backs of their counters. Other fortress and garrison units are restricted as follows:
Britain:
- The Cey fortress unit can only be placed in Trincomalee (w3509).
- The HK fortress unit can only be placed in Hong Kong (w4222).
- The Sing fortress unit can only be placed in Singapore (w3218).
Japan:
- The Dai fortress unit can only be placed in Dairen (w5125).
- A Per fortress unit can be placed in any Land hex on the map, but only if the Axis Japanese Mandate marker is on the VP Track. Only one Japanese unit per turn can be converted into a Per fortress.
- The Sai fortress unit can only be placed in Saipan (e3906).
- The Truk fortress unit can only be placed in Truk (e3408).
Manchukuo:
- The Dai fortress unit can only be placed in Dairen (w5125).
Russia:
- The Vlad fortress unit can only be placed in Vladivostok (e5301).
- A Line fortress unit can only be placed in a hex within Russia that shares a border with Manchukuo. Only one Russian unit per turn can be converted into a Line fortress.
Clarification
Note that certain hexes may change hands during the game. Once a Line fort is placed, it stays in the hex until it is eliminated, even after it’s no longer on a Border. For example, if Heilungkiang has not been ceded to Russia, the Soviet faction could build a Line fort in Blagoveshchensk (w5727), as that hex shares a Border with Manchukuo. After Heilungkiang has been ceded, that unit would be able to stay there, but the Soviet faction could not build a new Line fort in w5724.
US:
- The Gm fortress unit can only be placed in Guam (e3806)
- The Man fortress unit can only be placed in Manila (w3824)
Clarification
Although garrison units may not combine, remember that they may convert into fortress units. For example, the Western faction could convert the Hong Kong 0-1-0 garrison infantry unit into the HK 0-2-0 fortress unit.
2.3.3 Voluntary Unit Elimination
After all combinations and fortress conversions are completed, but before any breakdowns take place, the phasing player may voluntarily eliminate any friendly ground unit on the map.
Important: The whole unit must be eliminated, not individual steps.
If a voluntarily eliminated unit does not have a Delay Stripe, it is placed in its Force Pool.
If it does have a Delay Stripe, it is immediately placed on the Turn Track as if a Delay die roll of 1 had been rolled for it. Apply any current Delay DRMs to get the final Delay Result (7.1).
Example: An Axis HQ unit is voluntarily eliminated during the May- June turn. The current Delay DRM is 0, so it is placed in the June- July box. If the Delay DRM were +1, it would be placed in the July- Aug box.
Design Note
You may want to voluntarily eliminate units to return hopelessly isolated forces to the Force Pool or to get an important Delay Stripe unit (such as an HQ) back into the Force Pool quickly. Of course, the cost of losing that unit’s steps has to be taken into account, but sometimes it is worth it.
2.3.4 Breakdown
After all combinations, fortress conversions, and voluntary unit eliminations are completed, the phasing faction may break down multi-step units into smaller units.
Breaking down a unit is basically the reverse of combining units. A unit breakdown is done one step at a time, but can continue as long as further breakdowns are possible.
A multi-step unit that breaks down does not have to be supplied.
A multi-step unit can break down in a hex containing an enemy Air unit.
Emergency Breakdown: A player may be required to perform a breakdown due to a specific game event in a Phase or Segment other than the Organization Segment. Such a breakdown follows the normal breakdown rules listed below. Because Fortress units cannot breakdown, they would be eliminated instead.
2.3.4.1 Breaking Down Units
Two-step Units: A two-step unit without a one-step unit on its other side can break down by taking two one-step units from its Force Pool, placing them where the two-step unit is, and removing the two-step unit from its current location.
Example: A two-step Japanese HQ unit breaks down by taking two Japanese one-step infantry units from the Force Pool and placing them in the same hex as the HQ. The HQ is then placed in the Delay Box because it has a Delay Stripe.
A two-step unit with a one-step unit on its other side can break down by flipping to its one-step side, taking another one-step unit from its Force Pool, and placing it with the flipped over one-step unit.
Example: A two-step Japanese 3-3-1 infantry unit breaks down by flipping it over to its 2-1-1 one-step side, taking a one-step Japanese infantry unit from the Axis Force Pool, and placing it with the 2-1-1 infantry unit.
Three-step Units: A three-step unit with a two-step unit on its other side can break down by flipping over the three-step unit to its two-step side, taking a one-step unit from its Force Pool, and placing it with the two-step unit.
Example: A British three-step 6-6-2 mech army may break down by flipping over to its 4-4-1 two-step infantry side, taking a one-step 2-1- 2 armor unit from the Western Force Pool, and placing it with the 4- 4-1 unit. If it wanted, the Western faction could then break down the 4-4-1 two-step unit.
Holding Box Units: A multi-step unit that has a Holding Box breaks down like other units. However, instead of taking a unit from its Force Pool (when needed) during a breakdown, the unit in the Holding Box must be taken.
2.3.4.2 Breakdown Restrictions
A Fortress unit cannot voluntarily break down.
Clarification
These units have squares instead of dots for their Step Value to remind you of this.
A faction cannot switch different multi-step units in the process of combining.
Example: The Axis player cannot breakdown a three-step Japanese 3- 2-1 HQ unit by replacing it with a two-step 3-3-1 infantry unit.
Elite Units: An elite one-step unit (2.3.4.3) cannot be taken from a Force Pool and placed on the map unless the unit was necessary to combine into the multi-step unit that is breaking down.
Colonial Units: A colonial unit can be taken from the Force Pool when breaking down a non-colonial multi-step unit. However, when breaking down a colonial multi-step unit, a non-colonial unit cannot be taken from the Force Pool.
Example: A two-step1-2-1 Japanese colonial infantry army breaks down by flipping over to its 0-1-1 one-step colonial infantry side, taking another one-step Japanese colonial infantry-type unit from the Axis Force Pool, and placing it in the same location. The infantry- type unit taken from the Force Pool cannot be a non-colonial unit.
△ Kwantung: The Axis faction cannot take regular Japanese one-step units from the Force Pool when breaking down Kwantung units; it must use Kwantung units instead.
△ Clarification
This distinction makes Kwantung units slightly different than SS units in TK. In that game, you can take regular German units when breaking down an SS unit.
△ 2.3.4.3 Elite Units
The following Elite units are subject to the Breakdown Restriction described above.
- Airborne
- Cavalry
- Marine
- British FE infantry
- Chinese Exp/Def infantry/port-a-fort
- Japanese IG infantry/port-a-fort
- Japanese Kwantung
- Russian G (Guards) infantry or tank
- Russian S (Shock) infantry
Clarification
Elite one-step units have their unit-type symbol shaded to remind you of this rule.
Example: A two-step Russian Shock infantry army breaks down by flipping it over to its 2-1-1 one-step side, taking a one-step Russian infantry-type unit from the Soviet Force Pool, and placing it in the same location. The infantry-type unit taken from the Force Pool cannot be an Airborne, Cavalry, or Shock unit because those are Elite units, none of which were required to combine into a Shock army. (The 2-1-1 necessary to combine into a Shock army is already on the map after the two-step army was flipped over.)
2.3.5 Detachments
During its Organization Segment, the phasing faction can place and/or remove friendly Detachment markers from the map.
Placing Detachments: A Detachment in the Force Pool can be placed in any hex containing a ground unit of the same nationality.
Clarification
You do not flip a unit over to its Detachment side. In effect, that ground unit has just broken down a little bit of itself to form the Detachment, but the parent unit remains.
Detachment Placement Restriction: A Detachment marker cannot be placed in a hex that already contains a Detachment or Logistics marker.
Removing Detachments: A Detachment on the map can be removed and placed in the Delay Box.
If an enemy ground unit or Airdrop marker enters a hex containing only a Detachment marker during any Movement or Combat Phase, the Detachment marker is removed. The enemy ground unit or Airdrop marker can then proceed normally.
Clarification
Shooing away Detachments in this manner does not hinder operations in any way.
A unit does not need to be supplied to place or remove a Detachment. A Detachment can also be placed and/or removed in a hex containing an enemy Air unit.